前回、OpenAI APIを使って、前回のレスポンスに続けたメッセージ送信、システムプロンプト、ファイル入力などの操作をしました。今回はMCPツール連携とStreamingレスポンスの受信をしていきます。
これからやること
- MCPツール一覧の指定
- MCPツール呼出への対応
- Streamingレスポンスの受信
今回使うMCPサーバー
適当に作ったインチキ天気予報のMCPサーバーです。
▼tools/listの結果
{
    "jsonrpc": "2.0",
    "id": "1",
    "result": {
        "tools": [
            {
                "name": "get-weather-tool",
                "title": "Get Weather Information",
                "description": "    This tool retrieves weather information and forecasts for a specified location and date.",
                "inputSchema": {
                    "properties": {
                        "location": {
                            "description": "場所を指定してください。255文字以内。例: ロンダルキアの大地",
                            "type": "string"
                        },
                        "date": {
                            "enum": [
                                "今日",
                                "明日",
                                "明後日"
                            ],
                            "type": "string"
                        }
                    },
                    "type": "object",
                    "required": [
                        "location",
                        "date"
                    ]
                },
                "annotations": []
            }
        ]
    }
}
▼tools/call の結果(weather, temperature, humidity, commentはランダム)
{
    "status": "success",
    "location": "ロンダルキアの大地",
    "date": "明日",
    "weather": "雨時々スライム",
    "temperature": "22℃",
    "humidity": "40%",
    "comment": "今日はレベル上げ日和です。"
}
MCPツール一覧の指定
MCPツール連携の方法は主に次の3通りです。
- Connectorsを使う(OpenAIで限定サポート:Google Workspace, Dropbox等)
- リモートMCPサーバーに自動アクセスさせる(クライアント側では中継しない)
- Function callingを使う(クライアント側で中継)
今回、Connectorsは使いません。
また、リモートMCPサーバーに自動アクセスさせると、
クライアント側でハンドリングできません。
MCPサーバーへの接続にAPIキーが必要な場合、セキュリティ上の問題が発生したりします。
というわけで、クライアント側でLLMとMCPサーバー間の中継をしたいので、
今回はFunction callingを使います。
中継の流れの概要はOpenAI Platformのドキュメントにステップとフロー図があります。
MCPサーバーのツール一覧をLLMに渡すには、
「tools」にツール定義のオブジェクトを配列で渡せばOKです。
ツール定義のオブジェクトのフォーマットはこちら。
ツール定義オブジェクトの各プロパティについては、
MCPサーバーの tools/list リクエストのレスポンスで取得したtoolsの要素について、
- type: 常に「function」で固定
- name: 「name」を適用
- description: 「description」を適用
- parameters.properties: 「inputSchema.properties」を適用
- parameters.required: 「inputSchema.properties.required」を適用
でOKでしょう。
▼tools一覧を渡す例
curl https://api.openai.com/v1/responses \
-H "Content-Type: application/json" \
-H "Authorization: Bearer $OPENAI_API_KEY" \
-d '{
"model": "gpt-5.2",
"tools": [
{
"type": "function",
"name": "get-weather-tool",
"description": " This tool retrieves weather information and forecasts for a specified location and date.",
"parameters": {
"type": "object",
"properties": {
"location": {
"type": "string",
"description": "場所を指定してください。255文字以内。例: ロンダルキアの大地"
},
"date": {
"type": "string",
"enum": ["今日", "明日", "明後日"]
}
},
"required": ["location", "date"],
"additionalProperties": false
},
"strict": true
}
],
"tool_choice": "required",
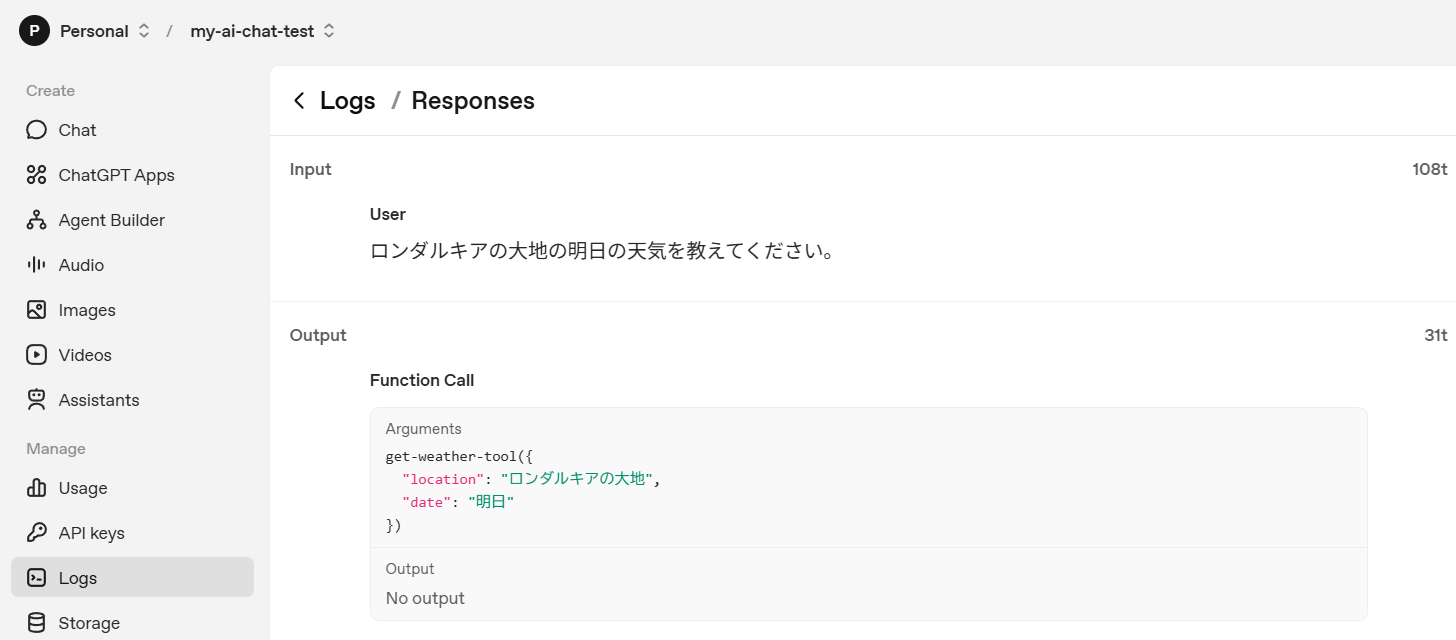
"input": "ロンダルキアの大地の明日の天気を教えてください。"
}'▼レスポンスの例
{
  "id": "resp_080aeea88a3228e8006959db68ef4c819f84aabf5665994653",
  "object": "response",
  "created_at": 1767496552,
  "status": "completed",
  "background": false,
  "billing": {
    "payer": "developer"
  },
  "completed_at": 1767496553,
  "error": null,
  "incomplete_details": null,
  "instructions": null,
  "max_output_tokens": null,
  "max_tool_calls": null,
  "model": "gpt-5.2-2025-12-11",
  "output": [
    {
      "id": "fc_080aeea88a3228e8006959db697e4c819fbd834d9c4702b8e0",
      "type": "function_call",
      "status": "completed",
      "arguments": "{\"location\":\"ロンダルキアの大地\",\"date\":\"明日\"}",
      "call_id": "call_gEof2IPABL5i6ybbUaoOyZy6",
      "name": "get-weather-tool"
    }
  ],
  "parallel_tool_calls": true,
  "previous_response_id": null,
  "prompt_cache_key": null,
  "prompt_cache_retention": null,
  "reasoning": {
    "effort": "none",
    "summary": null
  },
  "safety_identifier": null,
  "service_tier": "default",
  "store": true,
  "temperature": 1.0,
  "text": {
    "format": {
      "type": "text"
    },
    "verbosity": "medium"
  },
  "tool_choice": "required",
  "tools": [
    {
      "type": "function",
      "description": "    This tool retrieves weather information and forecasts for a specified location and date.",
      "name": "get-weather-tool",
      "parameters": {
        "type": "object",
        "properties": {
          "location": {
            "type": "string",
            "description": "場所を指定してください。255文字以内。例: ロンダルキアの大地"
          },
          "date": {
            "type": "string",
            "enum": [
              "\u4eca\u65e5",
              "\u660e\u65e5",
              "\u660e\u5f8c\u65e5"
            ]
          }
        },
        "required": [
          "location",
          "date"
        ],
        "additionalProperties": false
      },
      "strict": true
    }
  ],
  "top_logprobs": 0,
  "top_p": 0.98,
  "truncation": "disabled",
  "usage": {
    "input_tokens": 108,
    "input_tokens_details": {
      "cached_tokens": 0
    },
    "output_tokens": 31,
    "output_tokens_details": {
      "reasoning_tokens": 0
    },
    "total_tokens": 139
  },
  "user": null,
  "metadata": {}
}
※読みやすいように日本語の箇所だけjson_decodeしています。
LLMからのレスポンスで関数呼び出しの指示がきたことがわかります。
「output」の配列要素のオブジェクトにおいて、
- type: function_call
- name: weather-tool
- arguments: {\”location\”:\”ロンダルキアの大地\”,\”date\”:\”明日\”}
となっています。
MCPツール呼出への対応
LLMからの関数呼び出しの指示を受け取ったので、
その指示内容を基にクライアント側で処理実行して、
結果の出力をLLMにメッセージとして返します。
今回は、処理実行の結果、MCPサーバーから次の出力を受け取った前提で対応を進めます。
{
    "status": "success",
    "location": "ロンダルキアの大地",
    "date": "明日",
    "weather": "雨時々スライム",
    "temperature": "22℃",
    "humidity": "40%",
    "comment": "今日はレベル上げ日和です。"
}
MCPツール呼出における実装の仕方は、
OpenAI Platformのサンプルコードを見ると分かりやすいと思います。
サンプルコード側では、「input_list」に初回メッセージとLLMの回答含め、
会話履歴すべてを毎回送信するようになっていますが、
トークン消費を抑える目的で、
今回は、前回のレスポンスを指定してメッセージ送信することにします。
MCPサーバーのツール実行結果として受け取ったJSONは、
json_encodeした結果のテキストを「output」として送信します。
▼ツール実行結果の送信例
curl https://api.openai.com/v1/responses \
  -H "Content-Type: application/json" \
  -H "Authorization: Bearer $OPENAI_API_KEY" \
  -d '{
    "model": "gpt-5.2",
    "previous_response_id": "resp_080aeea88a3228e8006959db68ef4c819f84aabf5665994653",
    "input": [
      {
        "type": "function_call_output",
        "call_id": "call_gEof2IPABL5i6ybbUaoOyZy6",
        "output": "{\"location\":\"ロンダルキアの大地\",\"date\":\"明日\",\"weather\":\"雨時々スライム\",\"temperature_celsius\":22,\"humidity_percent\":40,\"comment\":\"今日はレベル上げ日和です。\"}"
      }
    ]
  }'
▼レスポンスの例
{
  "id": "resp_080aeea88a3228e8006959e49d0ab8819f941af9127235da5c",
  "object": "response",
  "created_at": 1767498909,
  "status": "completed",
  "background": false,
  "billing": {
    "payer": "developer"
  },
  "completed_at": 1767498910,
  "error": null,
  "incomplete_details": null,
  "instructions": null,
  "max_output_tokens": null,
  "max_tool_calls": null,
  "model": "gpt-5.2-2025-12-11",
  "output": [
    {
      "id": "msg_080aeea88a3228e8006959e49da1bc819f91b9b3c2c9e1049c",
      "type": "message",
      "status": "completed",
      "content": [
        {
          "type": "output_text",
          "annotations": [],
          "logprobs": [],
          "text": "ロンダルキアの大地の明日の天気は、**雨時々スライム**です。
- 気温:**22℃**
- 湿度:**40%**
- コメント:**今日はレベル上げ日和です。**"
        }
      ],
      "role": "assistant"
    }
  ],
  "parallel_tool_calls": true,
  "previous_response_id": "resp_080aeea88a3228e8006959db68ef4c819f84aabf5665994653",
  "prompt_cache_key": null,
  "prompt_cache_retention": null,
  "reasoning": {
    "effort": "none",
    "summary": null
  },
  "safety_identifier": null,
  "service_tier": "default",
  "store": true,
  "temperature": 1.0,
  "text": {
    "format": {
      "type": "text"
    },
    "verbosity": "medium"
  },
  "tool_choice": "auto",
  "tools": [],
  "top_logprobs": 0,
  "top_p": 0.98,
  "truncation": "disabled",
  "usage": {
    "input_tokens": 116,
    "input_tokens_details": {
      "cached_tokens": 0
    },
    "output_tokens": 64,
    "output_tokens_details": {
      "reasoning_tokens": 0
    },
    "total_tokens": 180
  },
  "user": null,
  "metadata": {}
}
※読みやすいように、日本語の箇所だけjson_decodeしています。
Streamingレスポンスの受信
前段までは、LLMの回答を1回の受信ですべての内容を受け取っていました。
LLMの回答を少量のトークンの塊でリアルタイムに受け取るのがStreamingレスポンスです。
ChatGPTで回答が少しずつ表示されていくやつですね。
「stream」プロパティで「true」を指定することでStreamingモードにすることができます。
▼メッセージ送信例
curl https://api.openai.com/v1/responses \
-H "Content-Type: application/json" \
-H "Authorization: Bearer $OPENAI_API_KEY" \
-d '{
"model": "gpt-5.2",
"instructions": "あなたはカバディ日本代表選手です。熱血バカです。",
"input": [
{
"role": "user",
"content": "今年の抱負を簡潔に教えてください。"
}
],
"stream": true
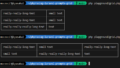
}'▼Streamingレスポンス受信の例
▼レスポンステキストの完成形の例
今年の抱負は――**日本代表として、守りも攻めも一段階ぶち上げて、勝ちに行く!**
毎日走って、毎日当たって、最後はコートで証明します。
Streamingレスポンスの個別に受信するeventについては
公式ドキュメントを見てください。
- 0
- 0
- 0
- 0

コメント