
暑いとダメ人間になってしまう筆者はしばらくブログをサボってました(反省)。
久しぶりにLaravel Newsをチェックしてみたら面白そうな記事がいくつかありましたが、その中でもとっつきやすそうだったのがこれです。(この選択の仕方がダメ人間かもしれない)
Laravel アプリケーション内の任意の Eloquent モデルにリアクション機能(👍、❤️、😂 など)を追加するパッケージ「Laravel Reactions」を使っていきます。

まとめと所感
先に結論から書いてしまいます。
▼Laravel Reactions は既存のEloquentモデルにリアクション機能を簡単に追加できる。
⇒ つまり既存プロジェクトへ後付け可能。
⇒ リアクター(ユーザー)側からのリアクション操作
⇒ リアクタブル(記事等)からのリアクション操作
▼リアクションの種類はパッケージ側で固定されている。
⇒ 利用者側で簡単に追加・削除できると尚良い。
⇒ と思いきや、実は利用者側で自由に設定できる。(バグなのか仕様なのかは不明)
▼ハンドリングされるのはリアクションの種類と件数、リアクター(ユーザー)のデータのみ。
⇒ リアクションの画面表示は自分で頑張る。
▼リアクションの種類と各カウントをまとめて取れるのは良い。
▼リアクター(ユーザー)の一覧を取れるのは良い。
⇒ リアクションの種類毎のリアクターが取れると尚良い。
▼カラム「ip」に値を登録できないのが気持ち悪い。(要らないけど)
▼総評:うーん、企画は良いが、構成がちょっと雑。中途半端で少し使いにくい。
⇒ もうふた頑張りくらい必要かも。(暑いとやる気の出ない今の筆者ではPR不可)
⇒ 何でこのレベルのパッケージがLaravel Newsで紹介されるの?
今回の目標
今回は次のようなモデル構成にします。
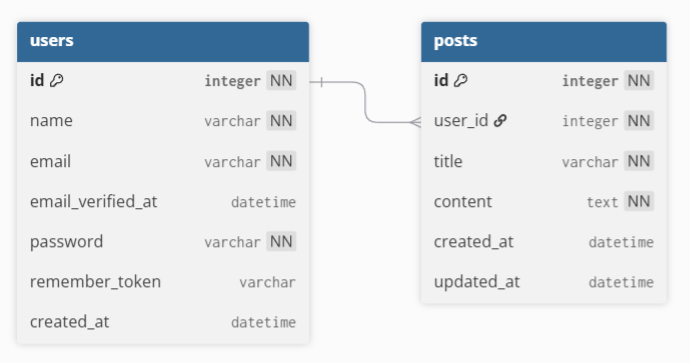
巷のサンプルでよくある「ユーザー」と「投稿」のモデルです。
最終的には、この「投稿」に対して「ユーザー」が「リアクション」を行い、
投稿に対するリアクションを画面表示させることが目標です。
前提条件
- PHP8.1以降に対応(筆者は8.4を使っていきます)
- Laravel 10.0以降に対応(筆者は12を使っていきます)
- Composer v2インストール済
- Laravelインストーラーインストール済
- Ubuntu24.04.2 LTS (on Windows11) 上で作業していきます
Laravelインストーラーは次のコマンドでインストールできます。
composer global require laravel/installerこれからやることの概要
- 新規Laravelプロジェクト作成
- Laravel Reactions パッケージインストール
- モデル作成、マイグレーションファイル作成、ファクトリー作成
- マイグレーション実行
- ダミーデータ作成
- アプリケーション作成
- リアクションコマンド作成
- リアクション実行とデータ確認
- 画面表示
新規Larvelプロジェクト作成
新規Laravelプロジェクト「laravel-reactions-app」を作成します。
laravel new laravel-reactions-app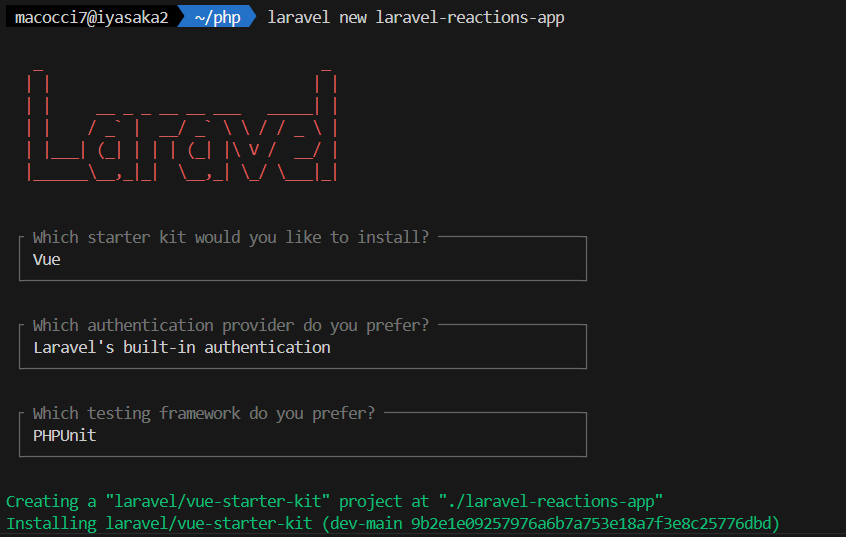
スタックの選択で「Vue」、
認証機構の選択で「Laravel’s build-in authentication」、
テスティングフレームワークで「PHPUnit」を選択しています。
npmのbuildは「Yes」を選択しています。
プロジェクトフォルダに入ります。
cd laravel-reactions-app
Laravel Reactions インストール
Composerでインストールします。
composer require binafy/laravel-reactions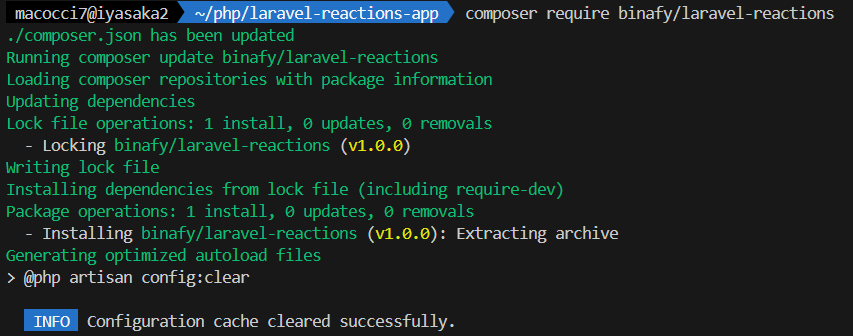
configとマイグレーションファイルをpublishします。
php artisan vendor:publish --provider="Binafy\LaravelReaction\Providers\LaravelReactionServiceProvider"
モデル作成、マイグレーションファイル作成、ファクトリー作成
「投稿」のモデル、マイグレーションファイル、ファクトリーを作成します。
php artisan make:model -m -f Post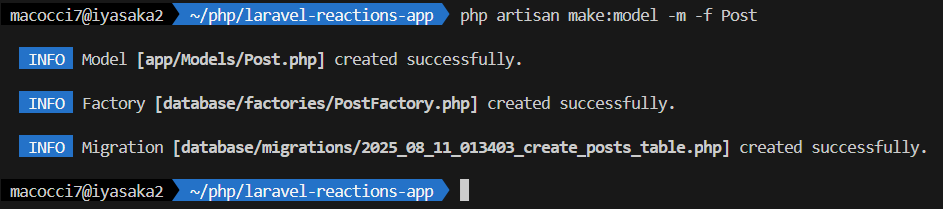
それぞれ編集します。
▼「app/Models/Post.php」
<?php

namespace App\Models;

use Binafy\LaravelReaction\Contracts\HasReaction;
use Binafy\LaravelReaction\Traits\Reactable;
use Illuminate\Database\Eloquent\Factories\HasFactory;
use Illuminate\Database\Eloquent\Model;

class Post extends Model implements HasReaction
{
    use HasFactory, Reactable;
}
▼「database/factories/PostFactory.php」
<?php

namespace Database\Factories;

use Illuminate\Database\Eloquent\Factories\Factory;

/**
 * @extends \Illuminate\Database\Eloquent\Factories\Factory<\App\Models\Post>
 */
class PostFactory extends Factory
{
    /**
     * Define the model's default state.
     *
     * @return array<string, mixed>
     */
    public function definition(): array
    {
        return [
            "user_id" => fake()->randomElement(\App\Models\User::pluck('id')),
            "title" => fake()->sentence(),
            "content" => fake()->paragraph(),
        ];
    }
}
▼「database/migrations/****_create_posts_table.php」
<?php

use Illuminate\Database\Migrations\Migration;
use Illuminate\Database\Schema\Blueprint;
use Illuminate\Support\Facades\Schema;

return new class extends Migration
{
    /**
     * Run the migrations.
     */
    public function up(): void
    {
        Schema::create('posts', function (Blueprint $table) {
            $table->id();
            $table->foreignId('user_id');
            $table->string('title');
            $table->text('content');
            $table->timestamps();
        });
    }

    /**
     * Reverse the migrations.
     */
    public function down(): void
    {
        Schema::dropIfExists('posts');
    }
};
もうひとつ、Userモデルも編集しておきます。
▼「app/Models/User.php」
<?php

namespace App\Models;

use Binafy\LaravelReaction\Traits\Reactor;
// use Illuminate\Contracts\Auth\MustVerifyEmail;
use Illuminate\Database\Eloquent\Factories\HasFactory;
use Illuminate\Foundation\Auth\User as Authenticatable;
use Illuminate\Notifications\Notifiable;

class User extends Authenticatable
{
    /** @use HasFactory<\Database\Factories\UserFactory> */
    use HasFactory, Notifiable, Reactor;

    /**
     * The attributes that are mass assignable.
     *
     * @var list<string>
     */
    protected $fillable = [
        'name',
        'email',
        'password',
    ];

    /**
     * The attributes that should be hidden for serialization.
     *
     * @var list<string>
     */
    protected $hidden = [
        'password',
        'remember_token',
    ];

    /**
     * Get the attributes that should be cast.
     *
     * @return array<string, string>
     */
    protected function casts(): array
    {
        return [
            'email_verified_at' => 'datetime',
            'password' => 'hashed',
        ];
    }
}
マイグレーション実行
マイグレーションを実行します。
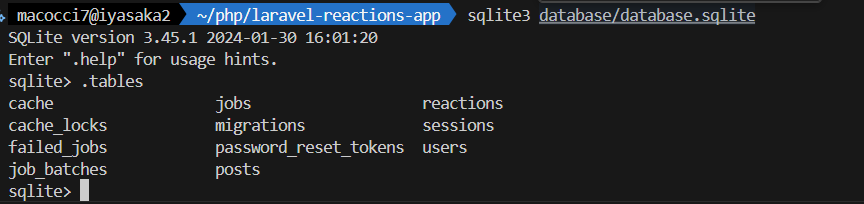
php artisan migrate
これにより、「posts」テーブルと「reactions」テーブルが作成されました。
ダミーデータ作成
では、ユーザーと投稿のダミーデータを作成していきます。
▼まずはtinker起動
php artisan tinker
▼ユーザー10件作成
\App\Models\User::factory()->count(10)->create();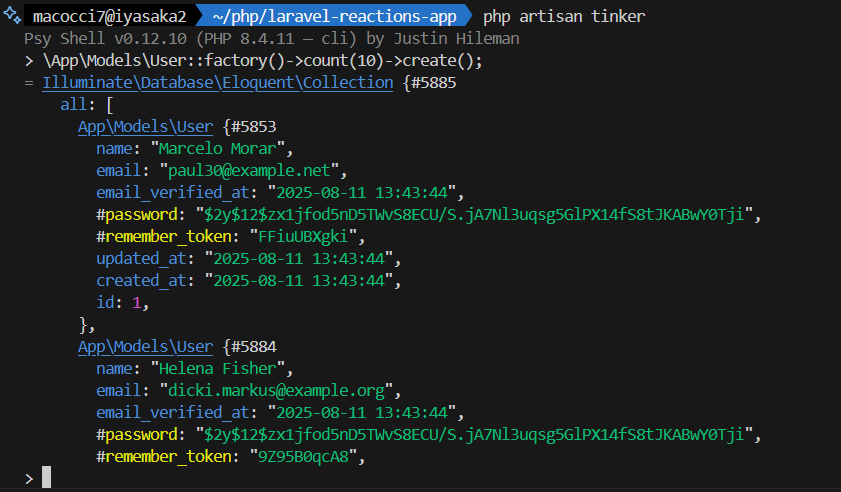
※作成されたユーザーレコードが表示されるので [q]キー押下で終了
▼投稿3件作成
\App\Models\Post::factory()->count(3)->create();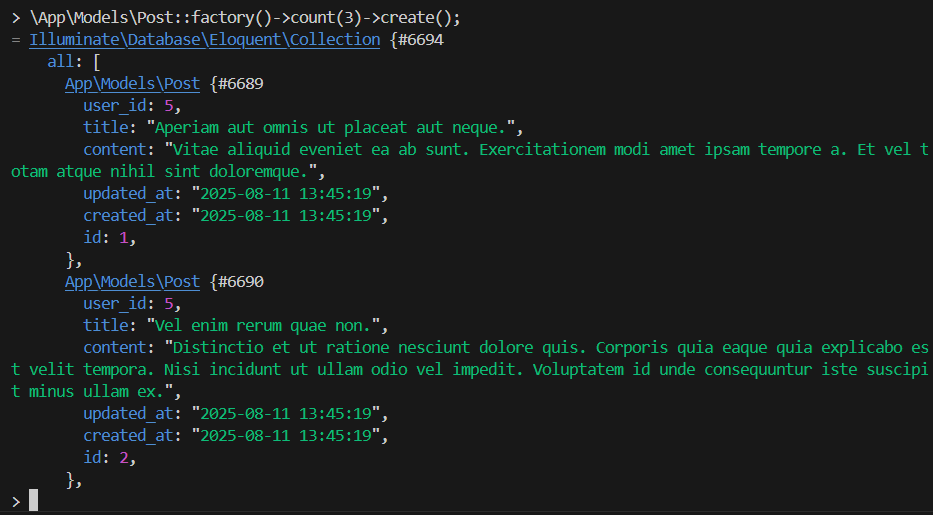
※作成された投稿レコードが表示されるので [q]キー押下で終了
定義されているリアクションの種類
リアクションの種類は、パッケージ側のEnumで定義されています。
▼「vendor/binafy/laravel-reactions/src/Enums/LaravelReactionTypeEnum.php」
<?php

namespace Binafy\LaravelReaction\Enums;

/*
 * You can use these reactions, but also you can store custom reaction.
 * This enum file helps to you for store reaction type.
 */
enum LaravelReactionTypeEnum: string
{
    case REACTION_LIKE = 'like';
    case REACTION_LOVE = 'love';
    case REACTION_SAD = 'sad';
    case REACTION_CLAP = 'clap';
    case REACTION_FIRE = 'fire';
    case REACTION_UNLIKE = 'unlike';
    case REACTION_ANGRY = 'angry';
    case REACTION_WOW = 'wow';
}
筆者であれば、利用者側で編集可能な構成にする(Enumをpublishする)のと、
文字列の出力機能(これも利用者側で編集可能にする。これもEnumをpublishで解決。)は付けますかね。。
これって利用者によってリアクションの種類は変えたいですよね。
なんか使い勝手悪い気がします。
リアクションの絵文字をEnumで対応させてみる
パッケージ側でEnumでリアクションが固定されているので、
ここは別に config でも良い気はしますが、
Enumでやられたので、Enumでやり返します。(意味不明)
本来はメンテナンス性を考慮して config でリアクションと絵文字(あるいは画像)の対応リストを定義して欲しいですよね。そしたらパッケージ側のEnum呪縛も、これから作るくだらん絵文字Enumも要らんのですよ。
はい、とりあえず Enum を作成します。
php artisan make:enum Enums/ReactionEmojiEnumEnumを編集「app/Enums/ReactionEmojiEnum.php」
<?php

namespace App\Enums;

enum ReactionEmojiEnum: string
{
    case LIKE = '😘';
    case LOVE = '❤️';
    case SAD = '😢';
    case CLAP = '👏';
    case FIRE = '🔥';
    case UNLIKE = '😒';
    case ANGRY = '😠';
    case WOW = '😮';

    // リアクション名と絵文字の対応をハッシュで返す
    public static function maps(): array
    {
        return array_combine(
            array_map(fn ($c) => strtolower($c->name), self::cases()),
            array_map(fn ($c) => $c->value, self::cases())
        );
    }
}
▼「ReactionEmojisEnum::maps()」によって、利用可能な「リアクション」と「絵文字」のセットをハッシュで取得可能です。
⇒ リアクションの選択肢表示で使えますよね。
array:8 [
  "like" => "😘"
  "love" => "❤️"
  "sad" => "😢"
  "clap" => "👏"
  "fire" => "🔥"
  "unlike" => "😒"
  "angry" => "😠"
  "wow" => "😮"
]
アプリケーション作成
では、パッケージとデータの準備ができたので、アプリケーションを作成していきましょう。
投稿記事3件を一覧表示するだけの簡単なものを作ります。
まずはコントローラーから。
php artisan make:controller PostsController
▼コントローラー編集「app/Http/Controllers/PostsController.php」
<?php

namespace App\Http\Controllers;

use App\Enums\ReactionEmojiEnum;
use Illuminate\Http\Request;
use Inertia\Inertia;

class PostsController extends Controller
{
    public function index()
    {
        $posts = [];
        foreach (\App\Models\Post::get() as $post) {
            $reactions = $post->getReactionsWithCount()->all();
            $posts[] = [
                'id' => $post->id,
                'title' => $post->title,
                'content' => $post->content,
                'reactions' => $reactions,
                'has_reaction' => ! empty($reactions),
                'created_at' => $post->created_at->format('Y-m-d H:i:s'),
            ];
        }

        return Inertia::render('Posts', [
            'posts' => $posts,
            'reactionEmojis' => ReactionEmojiEnum::maps(),
        ]);
    }
}
続いて、ビューを作成します。
▼ビューを新規作成「resources/js/pages/Posts.vue」
<script setup lang="ts">
import { Head, Link } from '@inertiajs/vue3';
defineProps({
    posts: Object,
    reactionEmojis: Array
});
</script>

<template>
    <Head title="Posts">
        <link rel="preconnect" href="https://rsms.me/" />
        <link rel="stylesheet" href="https://rsms.me/inter/inter.css" />
    </Head>
    <div class="">
        <h1 class="text-3xl px-4 py-8">Posts</h1>
        {{ console.log(posts) }}
        <ul>
            <li
                v-for="post in posts"
                class="px-4 py-4"
            >
                <h2 class="text-2xl text-gray-900">{{ post.title }}</h2>
                <p class="px-6 text-md text-gray-600">{{ post.content }}</p>
                <ul
                    v-if="post.has_reaction"
                    class="flex items-center"
                >
                    <li
                        v-for="(count, reaction) in post.reactions"
                        class="ml-4 pl-2"
                    >
                        {{ reactionEmojis[reaction] }}:{{ count }}
                    </li>
                </ul>
                <p class="px-6 text-sm text-gray-400">{{ post.created_at }}</p>
            </li>
        </ul>
    </div>
</template>
ルーティングを編集します。
▼「routes/web.php」
<?php

use Illuminate\Support\Facades\Route;
use Inertia\Inertia;

Route::get('/', function () {
    return Inertia::render('Welcome');
})->name('home');

Route::get('dashboard', function () {
    return Inertia::render('Dashboard');
})->middleware(['auth', 'verified'])->name('dashboard');

Route::get('posts', [\App\Http\Controllers\PostsController::class, 'index'])->name('posts.index');

require __DIR__.'/settings.php';
require __DIR__.'/auth.php';
ビルトインサーバーを起動します。
php artisan serve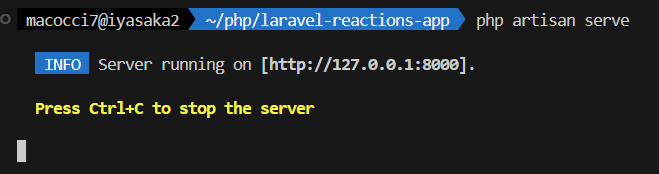
別ターミナルでViteを起動します。
npm run dev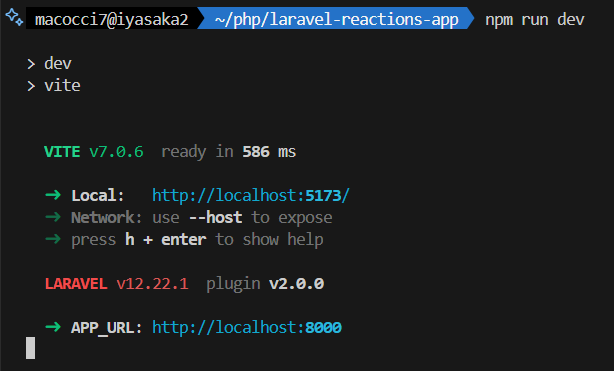
WEBブラウザで http://localhost:8000/posts にアクセスします。
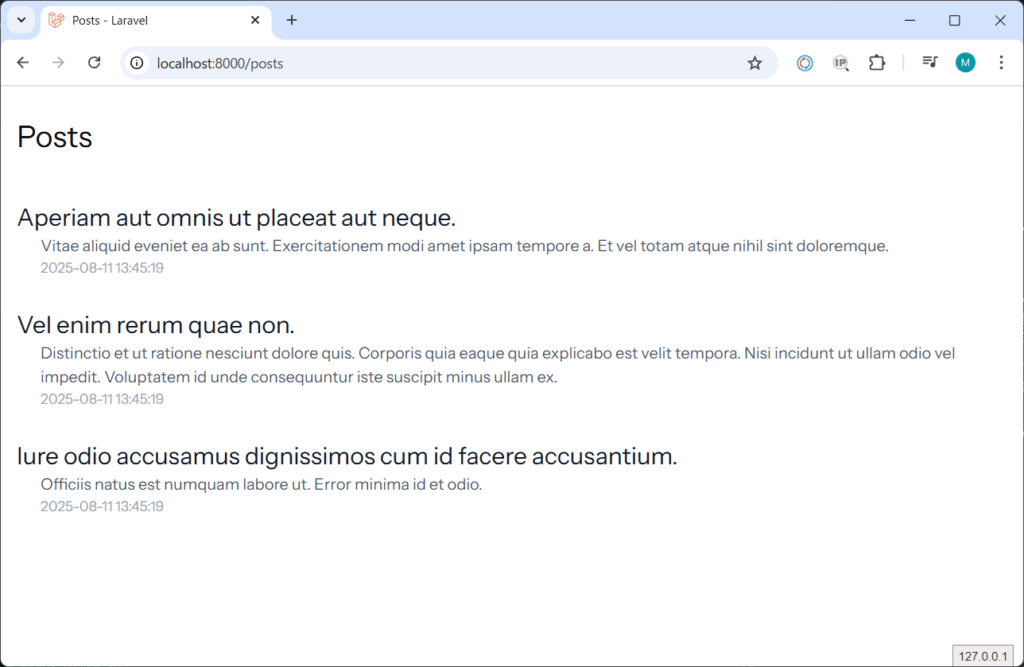
まだリアクションは実施していないので表示されません。
リアクションコマンドを作成してみる
本来は画面にリアクション機構を埋め込むべきですが、
その前に、どのようなデータの扱われ方をするのかを確認するために、
リアクションコマンドを作成してみます。
1.使用可能なリアクションタイプの一覧表示コマンド
2.投稿に対するリアクション実行コマンド
▼1.使用可能なリアクションタイプの一覧表示コマンドを作成
php artisan make:command ReactionAvailableCommand
コマンドを編集「app/Console/Commands/ReactionAvailableCommand.php」
<?php

namespace App\Console\Commands;

use Binafy\LaravelReaction\Enums\LaravelReactionTypeEnum;
use Illuminate\Console\Command;

class ReactionAvailableCommand extends Command
{
    /**
     * The name and signature of the console command.
     *
     * @var string
     */
    protected $signature = 'reaction:available';

    /**
     * The console command description.
     *
     * @var string
     */
    protected $description = 'Lists all available reaction types';

    /**
     * Execute the console command.
     */
    public function handle()
    {
        $this->info('Available reaction types:');
        foreach (LaravelReactionTypeEnum::cases() as $type) {
            $this->line("- " . $type->value);
        }
    }
}
実行してみます。
php artisan reaction:available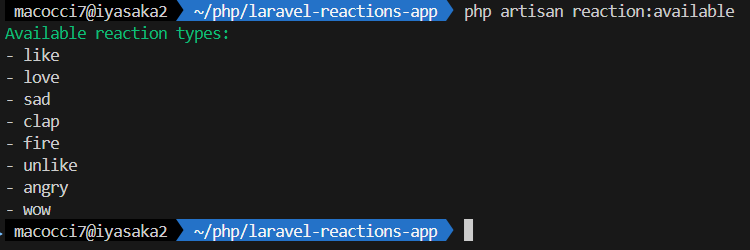
Enumの値が一覧表示されました。
▼2.投稿に対するリアクション実行コマンドを作成
php artisan make:command ReactionCommand
コマンドを編集「app/Console/Commands/ReactionCommand.php」
<?php

namespace App\Console\Commands;

use App\Models\Post;
use App\Models\User;
use Binafy\LaravelReaction\Enums\LaravelReactionTypeEnum;
use Illuminate\Console\Command;

class ReactionCommand extends Command
{
    /**
     * The name and signature of the console command.
     *
     * @var string
     */
    protected $signature = 'reaction {post_id : 投稿ID}
                                     {user_id : ユーザーID}
                                     {reaction_type : リアクションタイプ(文字列)}';

    /**
     * The console command description.
     *
     * @var string
     */
    protected $description = '投稿に対してリアクションを実行します。';

    /**
     * Execute the console command.
     */
    public function handle()
    {
        $postId = $this->argument('post_id');
        $userId = $this->argument('user_id');
        $reactionType = $this->argument('reaction_type');

        try {
            $post = Post::findOrFail((int) $postId);
        } catch (\Throwable $e) {
            throw new \Exception("Post[id = {$postId}] not found.");
        }
        try {
            $user = User::findOrFail((int) $userId);
        } catch (\Throwable $e) {
            throw new \Exception("User[id = {$userId}] not found.");
        }
        $availableReactionTypes = array_map(fn ($c) => $c->value, LaravelReactionTypeEnum::cases());
        if (! in_array($reactionType, $availableReactionTypes)) {
            throw new \Exception("Invalid reaction type. Available types: " . implode(', ', $availableReactionTypes));
        }
        $user->reaction($reactionType, $post);
    }
}
実行してみます。(投稿ID:1 に対して、ユーザーID:2 が、like リアクションを実行)
php artisan reaction 1 2 like
リアクションデータを確認してみる
上記のリアクション操作によって、テーブル「reactions」にレコードが作成されています。
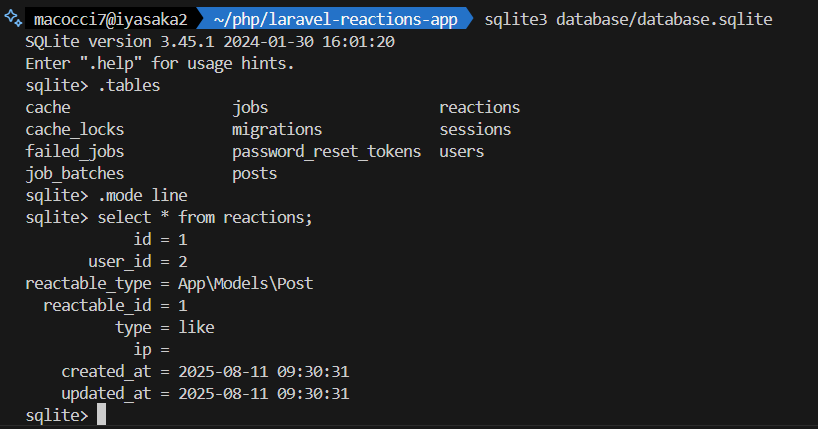
カラム「user_id」がリアクションをしたユーザーのIDですね。
カラム「reactable_type」でモデルが特定されています。
カラム「reactable_id」が「posts」テーブルの「id」に相当します。
カラム「type」がリアクションタイプの名称になります。
カラム「ip」は幽霊です。ここに値を登録することはできないようになっています。。
では、WEBブラウザをリロードしてみます。
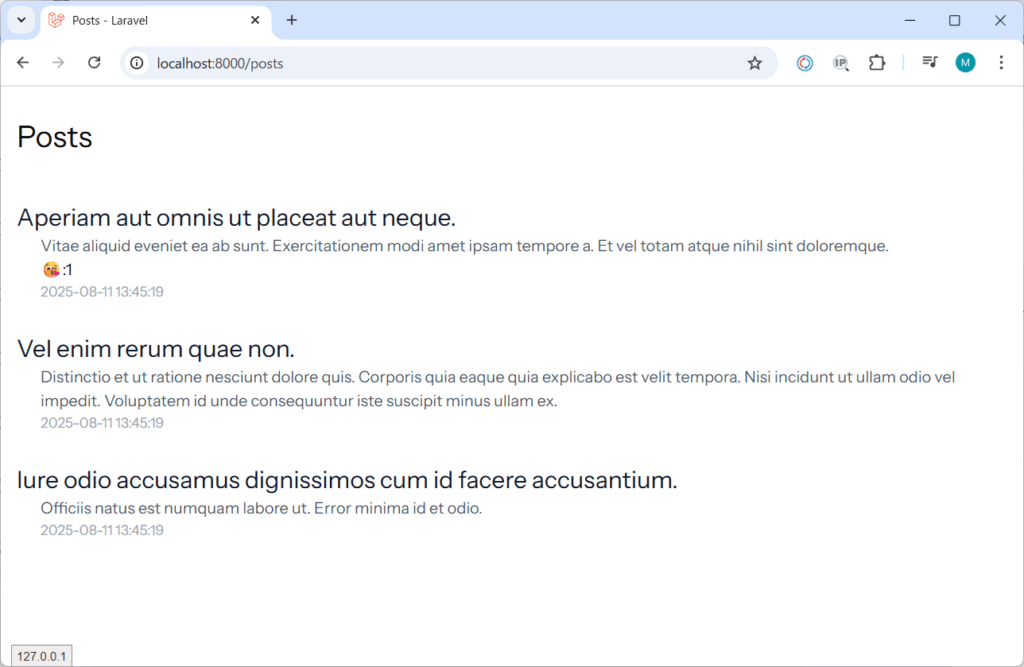
1件目の投稿にリアクションの絵文字とリアクション件数が表示されました。
さらに適当にリアクションを追加してみてからリロードするとこんな感じになります。

前段の方で「リアクションはパッケージ側のEnumで定義されていて、使い勝手が悪い」的なことを書きましたが、実は好きな文字列をリアクションの「type」としてデータ登録できます。
これがバグなのか仕様なのかは不明です。
普通、パッケージ側でEnumで定義されていれば、Enum内のcaseのみの縛りがかかると思うのですが、好き勝手な値を扱えるって作りがルーズ過ぎて「何だかなあ・・・」って感じです。
バグだとしたら、今後のバージョンアップで縛りが掛かる可能性があるし、
仕様だとしたら「ドキュメントに書いておけよ」って感じだし。
何より、Enumの意味ないじゃん!
なんかやる気がなくなってきたので、今回はここまでとしておきます。
パッケージが良い方向へ進化したら続きを書くかもしれません。
参考サイト
- 1
- 0
- 0
- 0


コメント